Information on building your own cartridges
|
Software development: Atari 2600: Video games: Schipperkes: Other pages: |
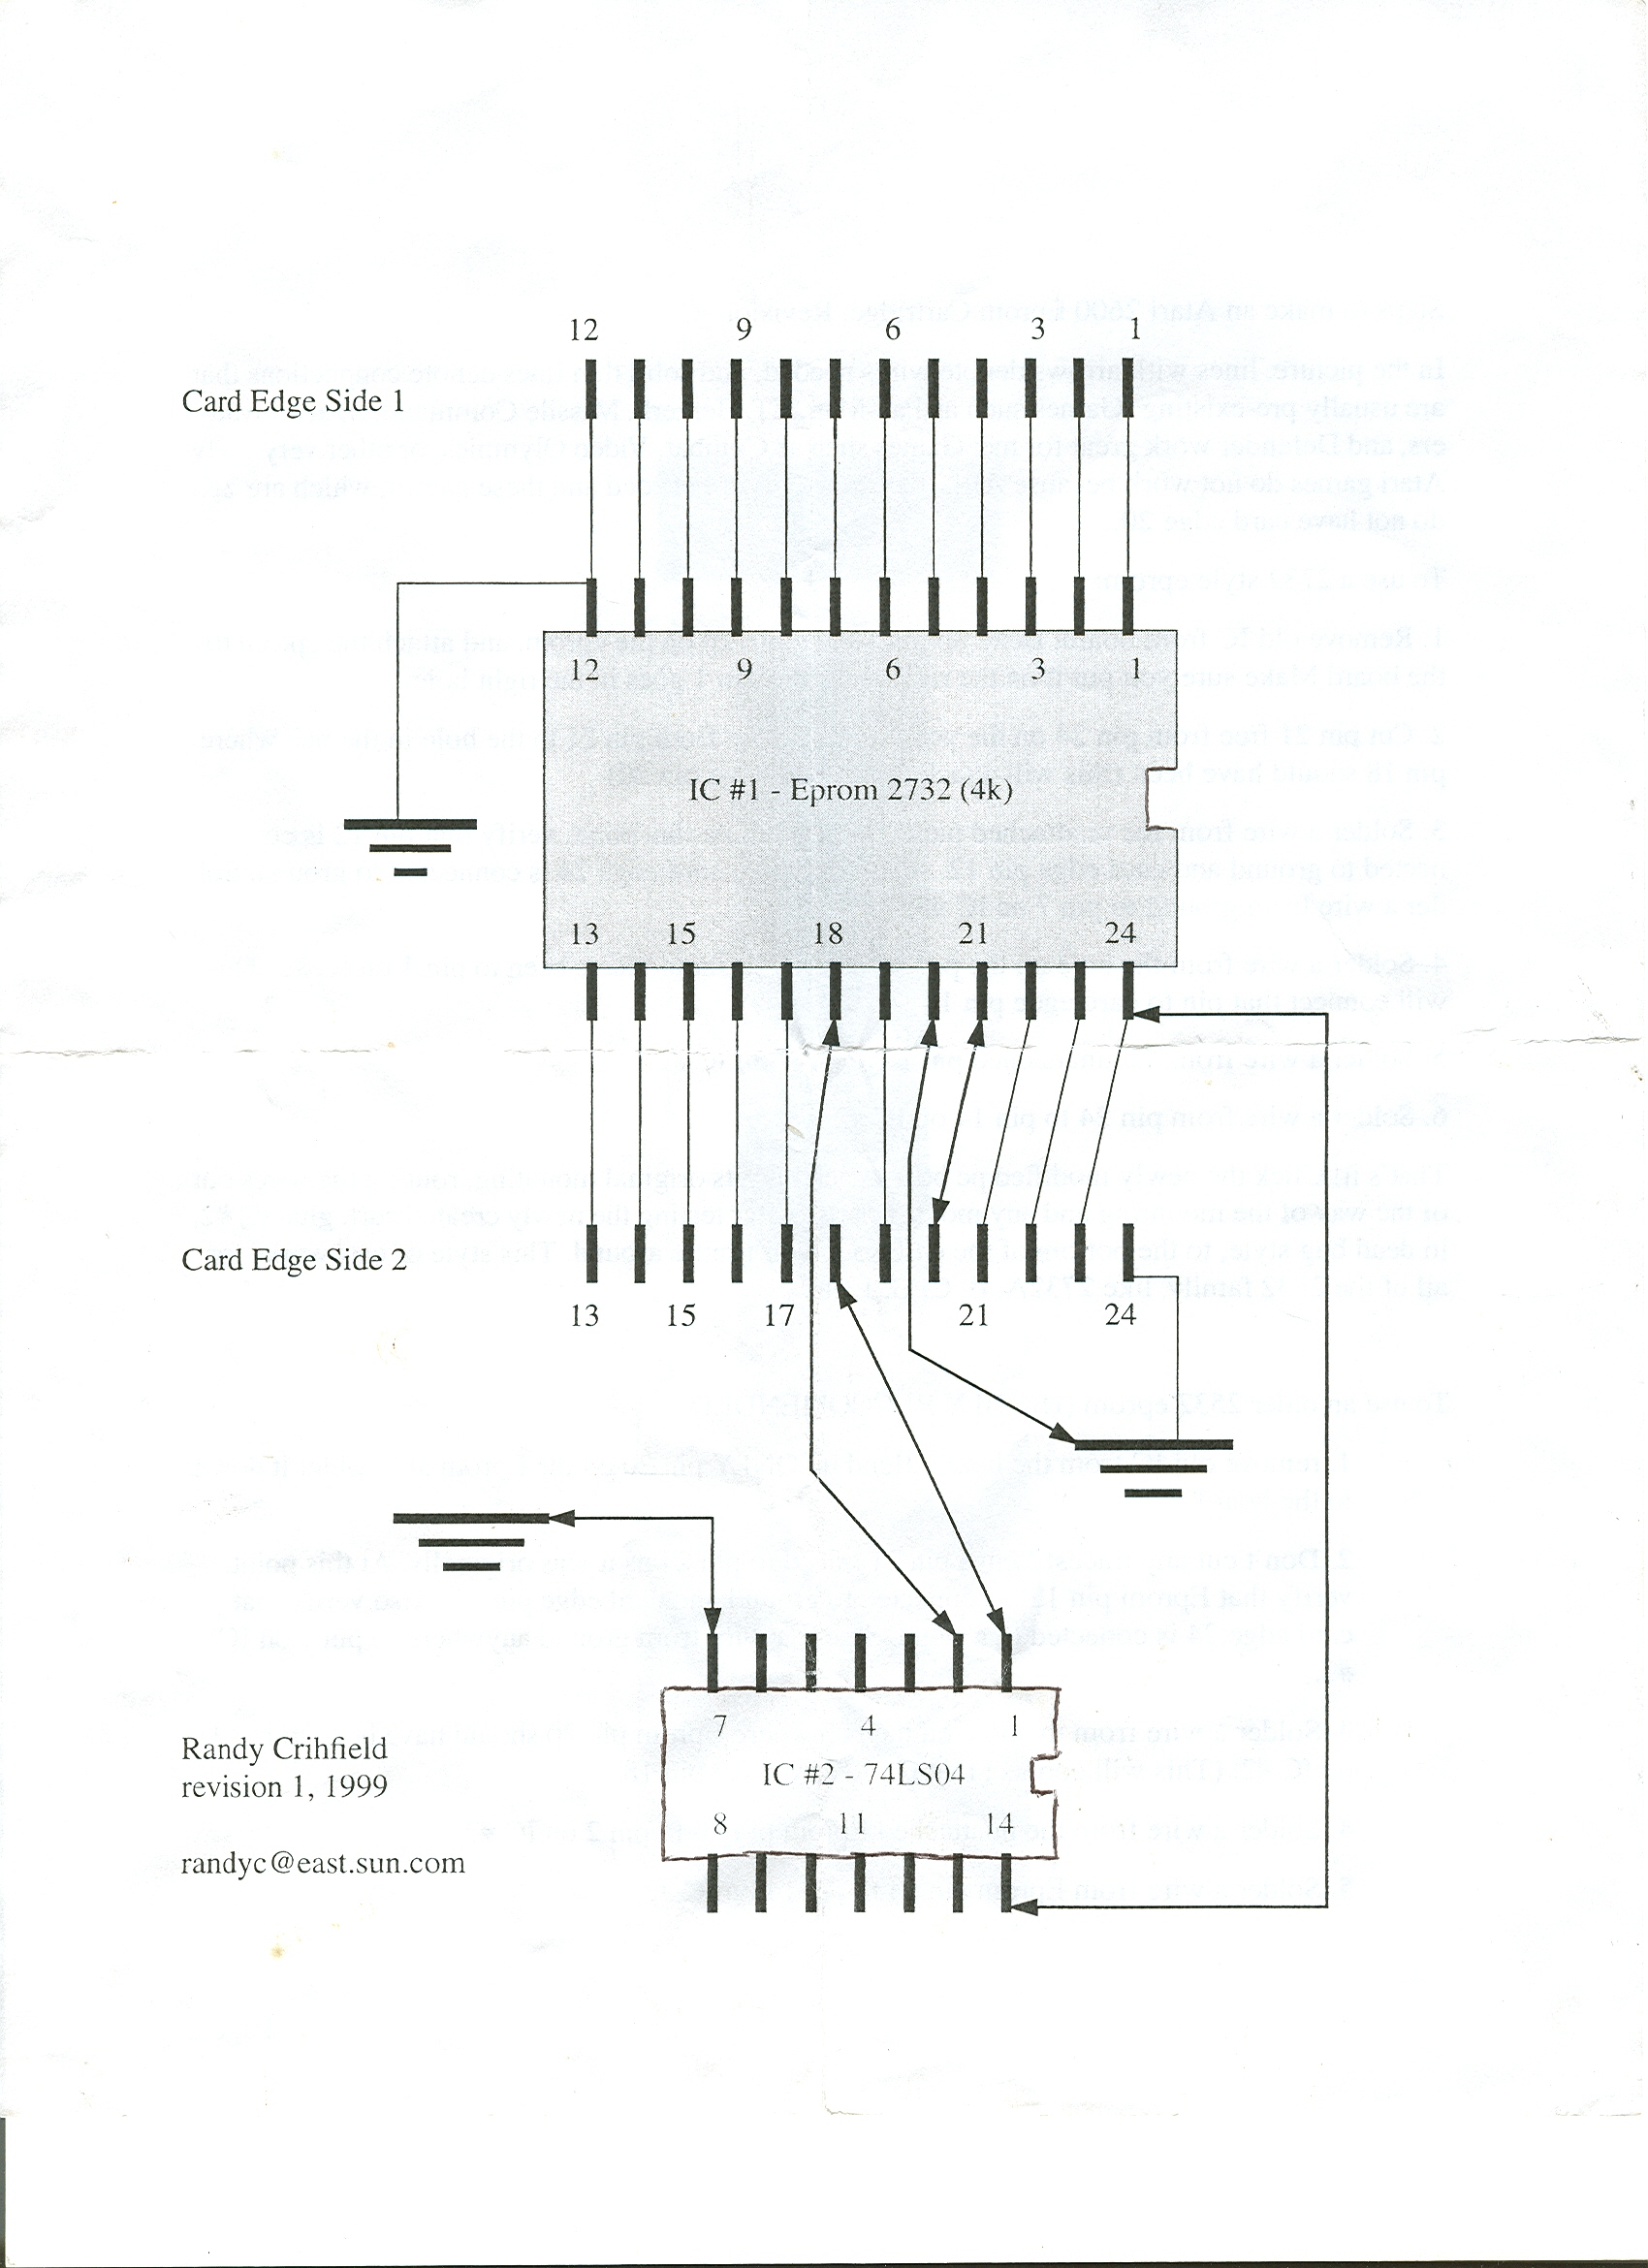
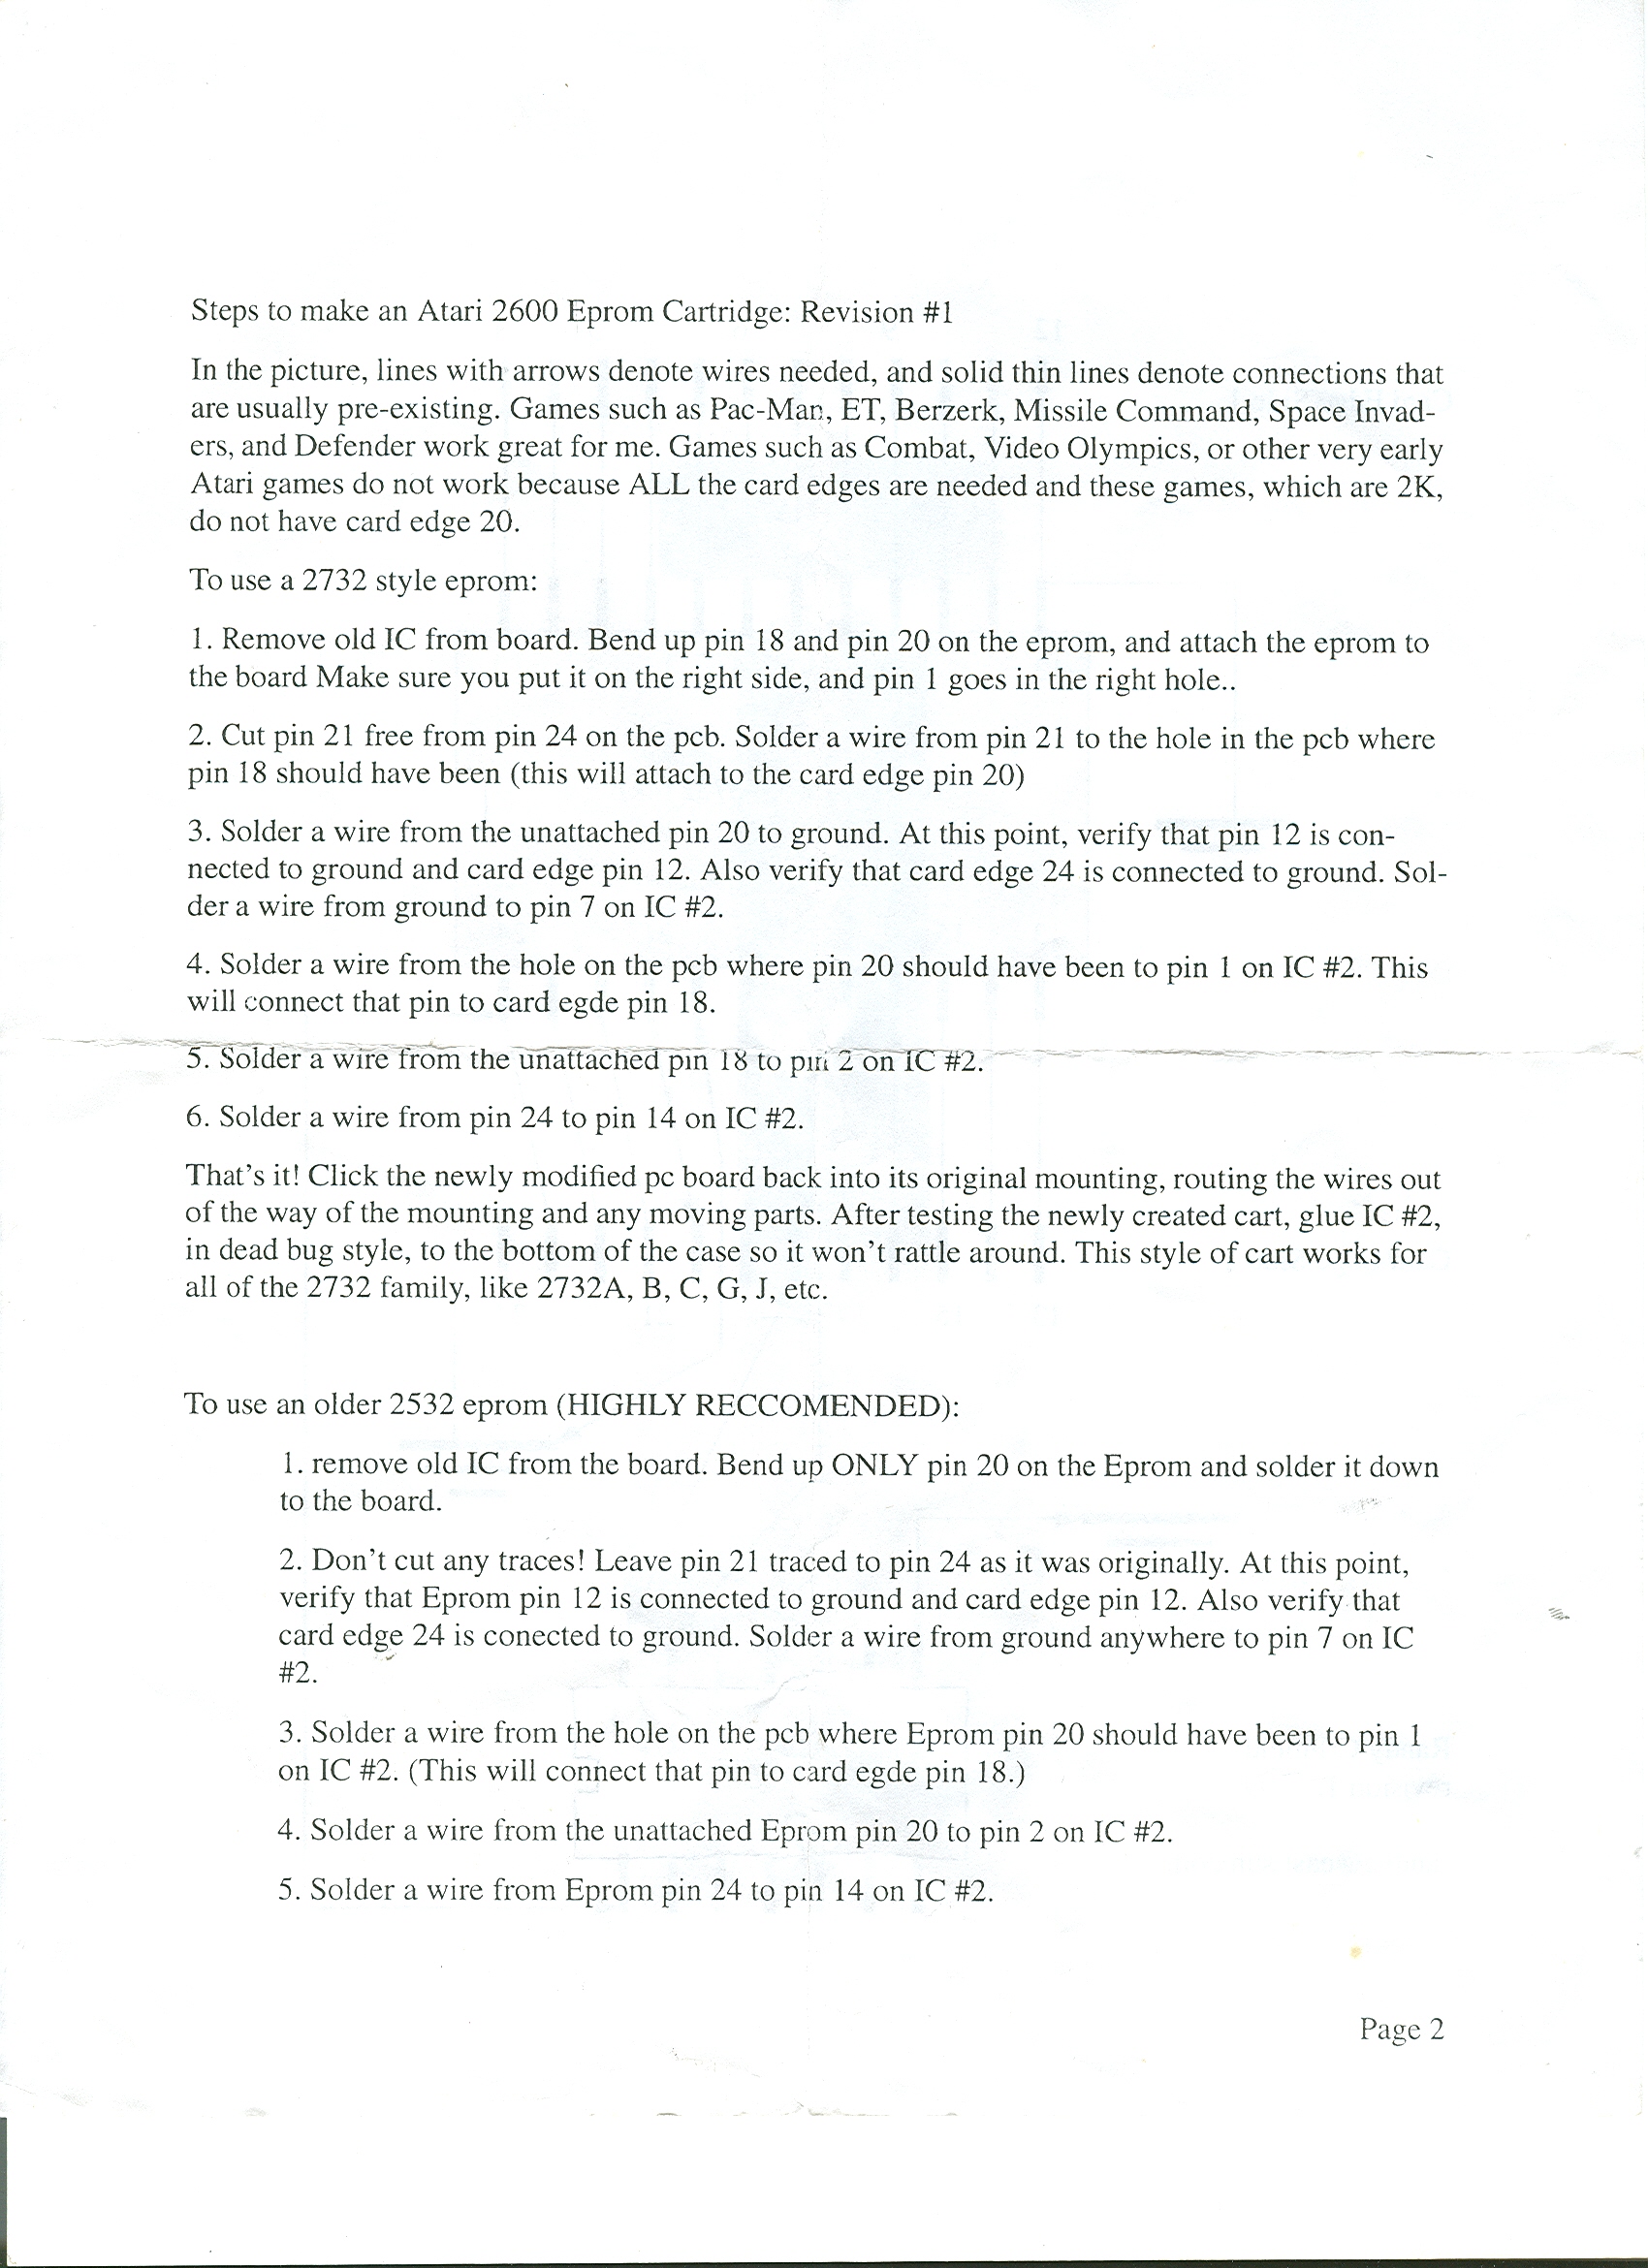
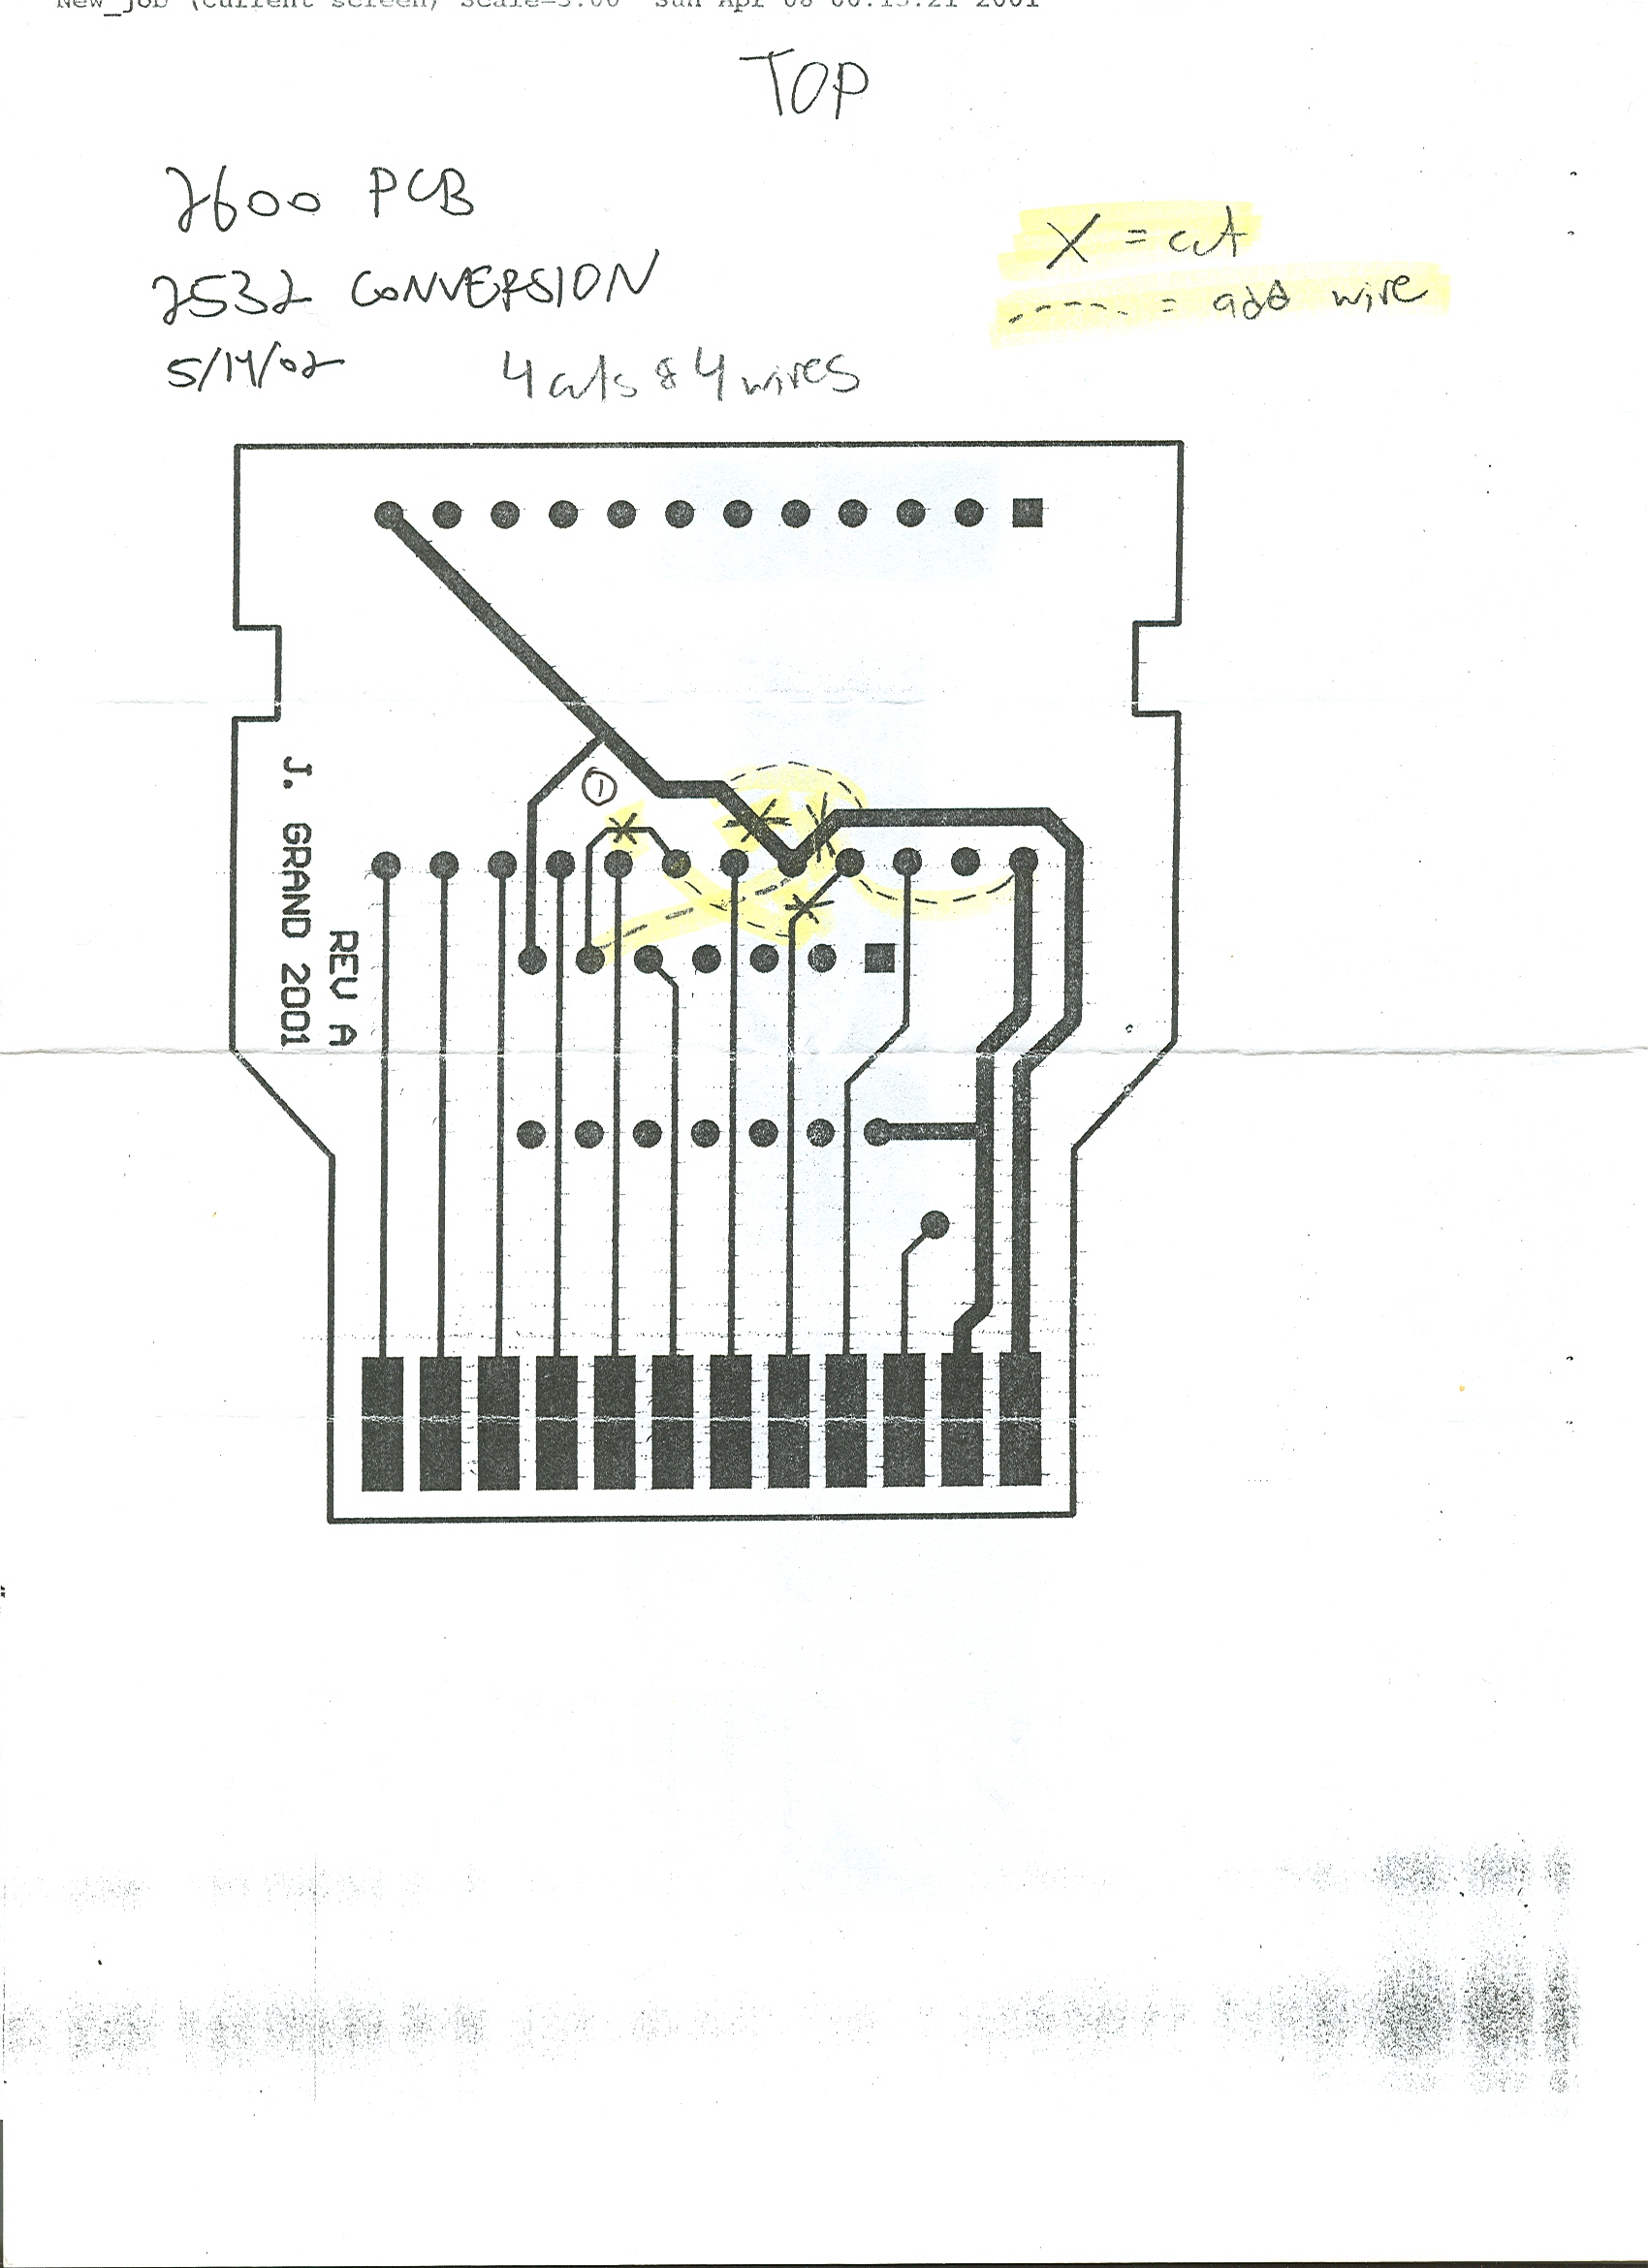
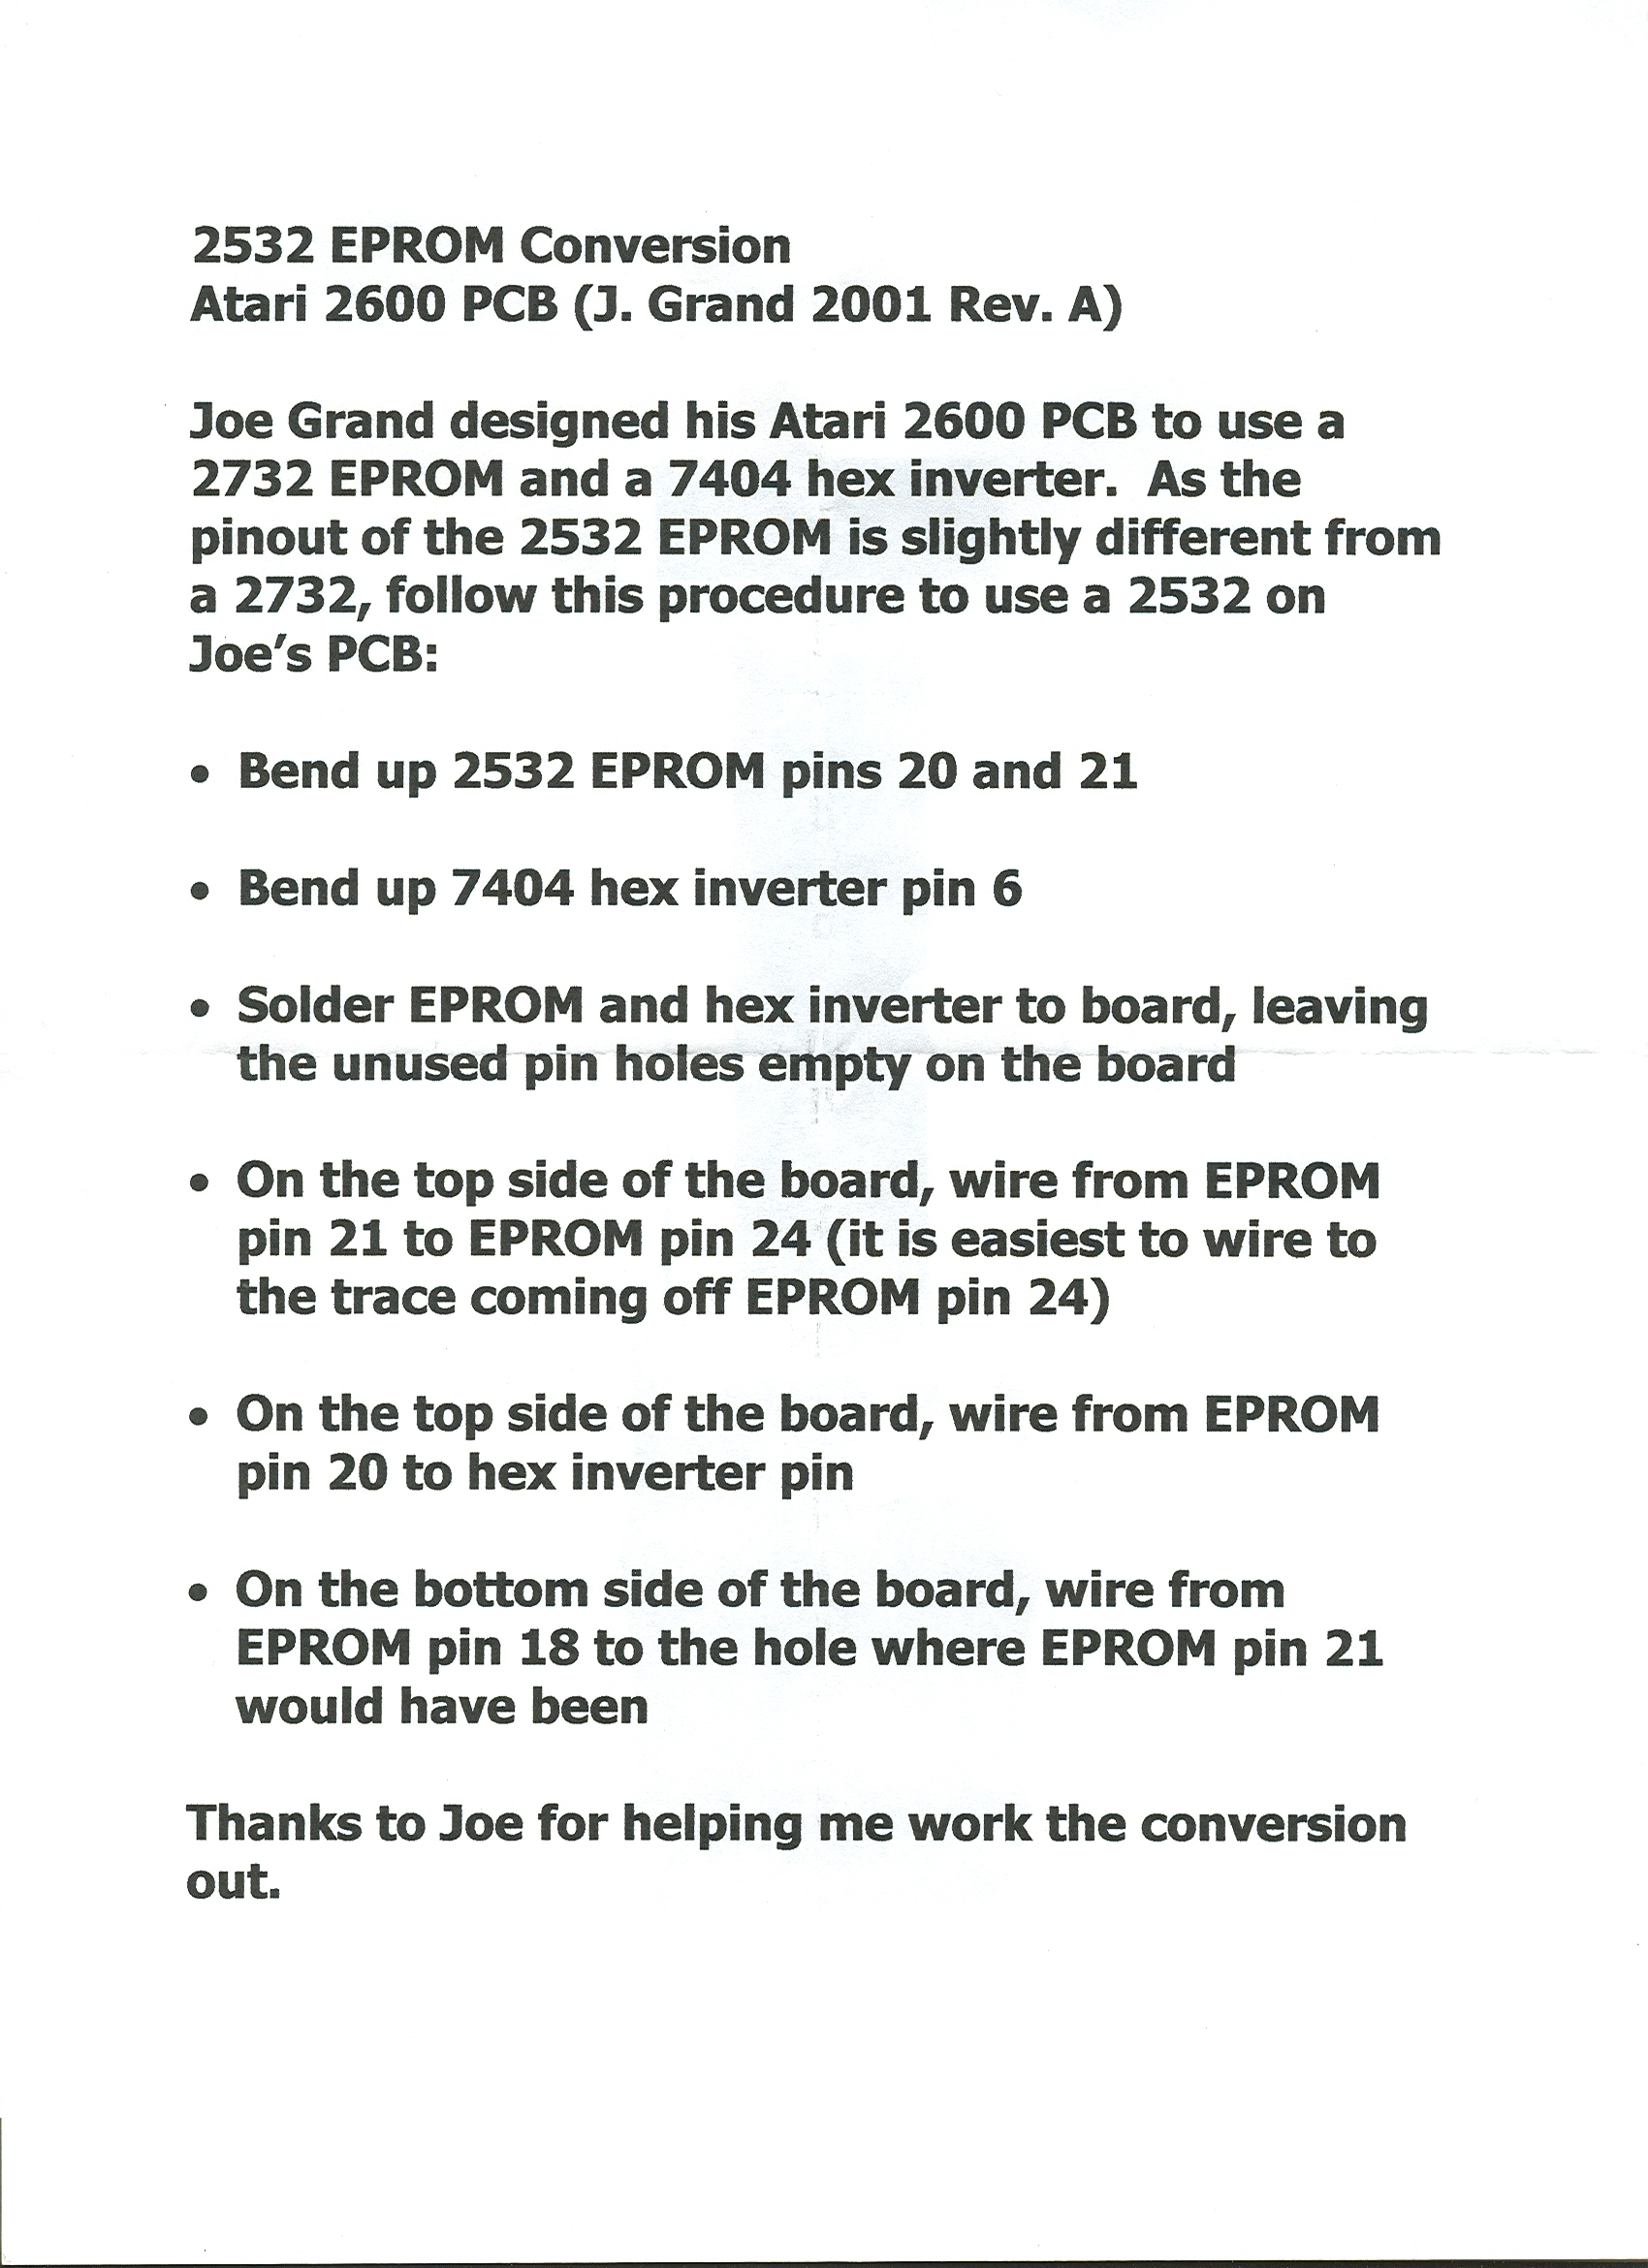
The Dark AgesWhen I started out putting together my Crazy Valet cartridges, I had to cannibalize the PCBs from old Atari cartridges. This is not a fun process, as you have to either cut the old ROM chip off of the PCB and try to solder the legs of the EPROM onto the metal pins left on the board, or desolder the old ROM out of the PCB. When it came time to attach the newly programmed EPROM (usually a 4K 2532 or 2732 EPROM), I used the following instructional sheets that I got from Randy Crihfield of Hozer Video to guide me, as the pinouts of the 2532 and 2732 required a 74LS04 hex inverter to mimic the original ROMs used. These are high resolution scans of the original page and may take a moment to load. Page 1 (838K) -- Page 2 (1.1M) The Modern EraThings got much better when Joe Grand designed a new PCB with both EPROM and hex inverter slots. This meant that the process of making carts would go much quicker since it took me much more time to desolder an old PCB than it did to create a board by soldering a chip onto it. Of course, things couldn't go that smoothly, now could they? I had purchased a huge lot of 2532 EPROMs, and Joe's board was designed for a 2732 EPROM. Not to worry, I contacted Joe about using the different chip, and he sent me back a sheet that showed the modifications necessary to allow the 2532 EPROM to work on his PCB. I found the process of cutting traces to be much more difficult however than other types of modifications (such as bending pins), and therefore put together my own cheat sheet of what to do to use a 2532 with his PCB. Both of those documents are available here: Joe's original drawing (790K) -- My own set of procedures (897K) |